
How to Safely Install Murphy Beds: 2026 DIY Guide
Table of Contents
- Tools Needed for Murphy Bed Installation
- Murphy Bed Wall Mounting Requirements
- How to Anchor a Wall Bed to Studs
- Step-by-Step: How to Safely Install Murphy Beds
- Baseboard, Trim, and Electrical Outlet Modifications
- Weight Limits, Mattress Compatibility, and Safety Checks
- Post-Installation Maintenance for Murphy Beds
- Conclusion
- Frequently Asked Questions
Last Updated: September 14, 2026
Tools Needed for Murphy Bed Installation
A wall bed is only as safe as the hardware holding it. This guide from Comfort Zone Shop walks through how to safely install murphy beds using our Tampa-area installers' sequence.
You will need a stud finder, a 4-foot level, a drill with a driver bit, a socket set, a tape measure, a pencil, and a helper. Keep the hardware kit's instructions open for pilot-hole bit sizes.
Two tools cause the most failures:
- A quality stud finder with deep-scan mode. Standard models miss studs behind thick drywall or plaster.
- A magnetic torpedo level. Cheap bubble levels drift, and a cabinet out of plumb by even a few degrees will bind when it folds.
Add a ladder, safety glasses, work gloves, masonry anchors, and shims.
Pro Tip
Test your stud finder against a known stud near an outlet before trusting it on the mounting wall. Outlet boxes are almost always fastened to a stud, so they make a reliable reference point.
Murphy Bed Wall Mounting Requirements
Murphy bed wall mounting requirements come down to four things: a structurally adequate wall, correct stud spacing, verified fastener pull-out capacity, and enough clearance for the bed to open and close freely. Get any wrong and the cabinet will not sit flat, no matter how tight the bolts are.
Identifying Load-Bearing Walls and Stud Spacing
A load-bearing wall carries structural weight from above. In wood-framed homes, identify one by its position perpendicular to the floor joists and its alignment through the center of the home. Interior walls running parallel to the roofline are usually non-load-bearing partitions.
But a load-bearing wall is not automatically the right wall. What matters is whether the framing behind your chosen spot can resist the pull-out force of a folding bed. The IRC's Table R602.3(1) sets minimum fastening schedules for wood framing, and Section R301.1 requires structural elements to support applied loads. A wall bed applies a concentrated, dynamic load, so a single stud is rarely enough.
Stud spacing is usually 16 inches on center, though older construction sometimes uses 24. Measure two or three bays before committing. If spacing is irregular or the baseplate holes miss stud centers, add a plywood backer board spanning at least three studs.
Exterior walls are almost always load-bearing with the most consistent stud layout, making them the preferred mounting surface. Interior partitions work only after you confirm full-dimension framing, not the thin metal or furring strips sometimes used behind paneling.
Clearance and Floor Space Planning
Clearance planning starts with the mattress footprint, not the cabinet. A queen wall bed needs roughly 7 feet of open floor in front of the cabinet when deployed, plus a few inches of buffer on each side; a twin needs closer to 6 feet. Measure from the face of the closed cabinet, not the wall.
Map the swing path with painter's tape before drilling, checking that ceiling fans, light fixtures, and closet doors stay clear. A cabinet that opens into a doorway or blocks a closet is an annoyance you cannot undo.
Also check ceiling height. Most vertical wall beds need at least 8 feet of ceiling clearance to fully open. Measure the diagonal from the cabinet's hinge point to the far corner of the bed frame in the open position, that diagonal is the true clearance requirement, and it is almost always larger than the bed's length.

Pro Tip
Tape the full open footprint on the floor, then place a chair at each corner. If you can walk the perimeter without moving the chairs, you have enough clearance.
Watch Out
Mounting a wall bed to a standard interior partition wall without verifying studs is the single most common DIY failure. The cabinet can pull free under load, damaging drywall and creating a genuine injury risk. If you cannot confirm solid framing, stop and consult a licensed contractor before drilling.
Verifying Wall Structure Before You Commit
Before you buy or unbox anything, do a five-minute structural check:
- Knock test. A dull thud suggests solid framing; a hollow ring suggests drywall over a void.
- Stud finder with deep-scan mode. Standard models miss studs behind thick drywall or plaster.
- Outlet and switch reference. Outlet boxes are almost always fastened to a stud, making them a reliable calibration point.
- Attic or basement peek. If you can see the framing, confirm stud size and spacing directly.
- Moisture check. Staining, soft drywall, or a musty smell may signal hidden water damage that compromises fastener holding strength.
If any check raises doubt, a plywood backer board spanning three studs is the standard fix. It spreads the load across more framing and gives you a flat mounting surface even if the wall is slightly out of plane.
How to Anchor a Wall Bed to Studs
Anchoring a wall bed to studs separates a safe installation from a dangerous one. The steel baseplate must be fastened into solid wood framing, not drywall alone, with every fastener driven to the correct depth and torque.
Using a Stud Finder and Drilling Pilot Holes
Mark each stud's centerline above and below the cabinet's footprint, then verify with a thin nail or awl: if it sinks easily, you hit drywall only. A stud should resist after about an inch.
Pilot holes should match the shank diameter of your lag bolts, not the thread diameter. Too small splits the stud; too large strips the threads. Check the bolt against your bit set before drilling.
Drill pilot holes 1/8 inch deeper than the bolt length so the bolt does not bottom out before the baseplate is tight. Blow dust out of each hole; packed sawdust can prevent full seating.
Drive lag bolts with a socket wrench or impact driver on low torque. Snug plus a quarter turn is the target, over-torquing crushes wood fibers and reduces holding strength.
Fasteners for Drywall, Masonry, and Toggle Bolts
The right fastener depends on what is behind the wall. Never substitute a drywall anchor for a structural bolt when the load is a folding bed.
| Surface | Recommended Fastener | When to Use |
|---|---|---|
| Wood studs | Lag bolts, 3/8 inch diameter, minimum 3 inches long | Standard wood-framed walls |
| Concrete or block | Sleeve-type masonry anchors, 3/8 inch | Basements, garage walls |
| Hollow drywall (no stud) | Heavy-duty toggle bolts | Only for secondary bracing or trim |
| Steel studs | Self-drilling screws plus a plywood backing plate | Commercial or newer construction |
A few specifics that matter more than the table:
- Lag bolt length. The bolt must penetrate the stud by at least 2-1/2 inches. With a 1/4-inch baseplate and 1/2-inch drywall, you need a bolt at least 3-1/4 inches long.
- Masonry anchors. Sleeve anchors expand against concrete when tightened. Drill the hole the exact diameter stamped on the anchor, a 3/8-inch anchor needs a 3/8-inch bit. A sloppy hole is the number-one cause of masonry anchor failure.
- Toggle bolts. These spread load across the back of the drywall, but drywall has limited pull-out strength. They are acceptable for trim or secondary brackets, never as the primary anchor for a baseplate.
- Steel studs. Self-drilling screws into 20-gauge steel studs will not hold a wall bed. Use a plywood backing plate spanning at least three studs.
If your wall lacks adequate studs, install a 3/4-inch plywood backer board spanning at least three studs and mount to that, fastening it to every stud it crosses with two screws per stud.
Key Takeaway
Fastener choice is a structural decision, not a hardware-store convenience decision. If you are unsure what is behind the wall, assume the worst and add a backer board.
Torque, Depth, and Inspection Criteria
After driving each bolt, check three things:
- Depth. The bolt head should sit flush against the baseplate with no gap. A visible gap means the bolt bottomed out or the hole is packed with debris.
- Torque feel. The bolt should feel firm and stop turning. If it keeps spinning, the threads stripped the wood, back it out and move to a fresh spot at least 2 inches away, or add a backer board.
- Baseplate contact. Slide a piece of paper between the baseplate and the wall. If it slides freely, the cabinet is not flush and the load is not transferring correctly.
Re-check every bolt after the first three fold cycles. New installations settle slightly, and a bolt snug on day one can be a quarter-turn loose after a few open-and-close cycles.
Step-by-Step: How to Safely Install Murphy Beds
The installation follows a fixed order: assemble the frame, mount the baseplate, hang the cabinet, then tune the mechanism. Skipping ahead, especially to the piston adjustment, is how cabinets end up crooked.
Assembling the Frame and Baseplate
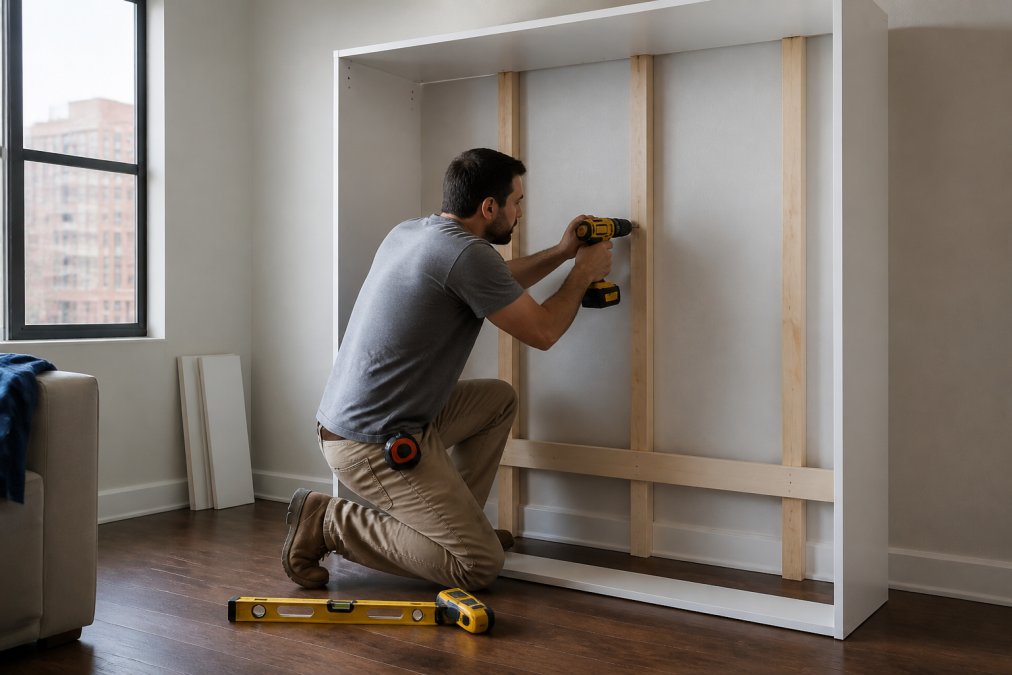
Lay the cabinet panels on a clean floor and follow the assembly diagram exactly. Most kits label panels with letters or numbers; mismatching them is the usual cause of a cabinet that will not square up.
Attach the baseplate to the frame before lifting anything. It is the steel interface between cabinet and wall and must be flush with the back edge of the frame. Check corner-to-corner diagonals; if they differ by more than 1/8 inch, the cabinet is out of square and will bind.
Mounting the Cabinet and Adjusting the Piston Mechanism
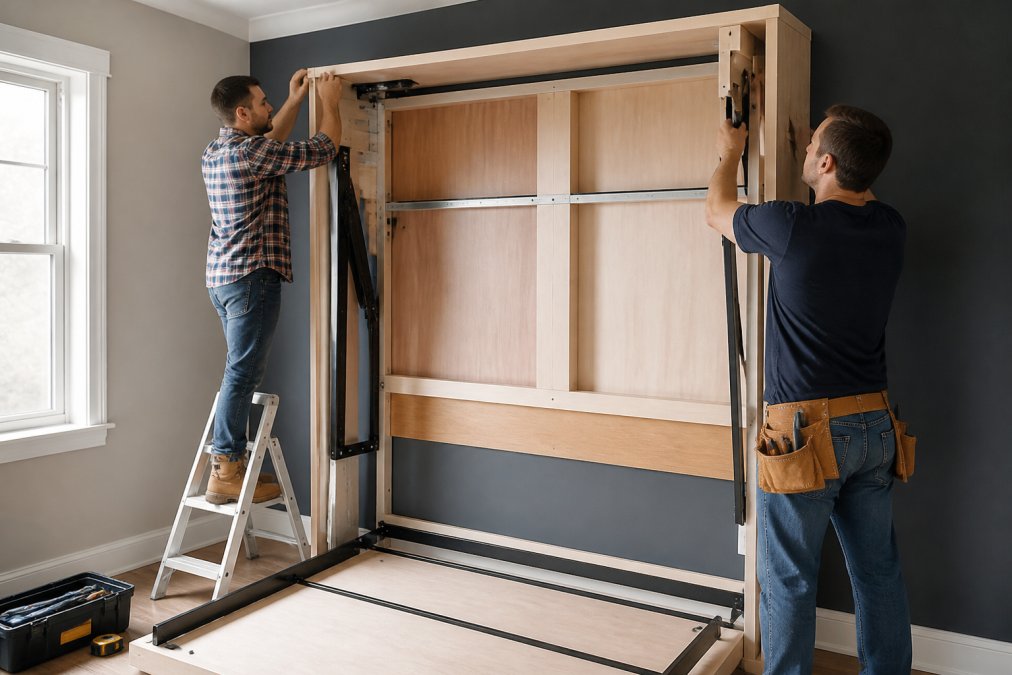
With a helper, lift the cabinet into position and align the baseplate holes with your pilot holes. Drive the top fasteners first, then check plumb before tightening the bottom row. A cabinet that leans will fight the piston mechanism for its entire service life.
The piston mechanism uses gas or spring tension to counterbalance mattress weight. Adjust tension only after the cabinet is fully fastened and the bed attached. Most systems have a threaded adjustment nut or mounting holes; move one setting at a time and test the fold cycle. The bed should lower smoothly under light hand pressure and return to the closed position without slamming.
Key Takeaway
The piston adjustment is a tuning step, not a structural one. If the bed feels too heavy or too light, the fix is tension, not more or fewer wall bolts.
Baseboard, Trim, and Electrical Outlet Modifications
Baseboards and outlets stall most installations. The cabinet must sit flush against the wall, but baseboard trim typically stands 1/2 to 3/4 inch proud, and outlets are often exactly where the baseplate needs to go.
For baseboard conflicts, you have three options:
- Notch the baseboard with an oscillating tool so the cabinet back sits against drywall. This is the cleanest fix and preserves the trim.
- Cut a relief strip behind the cabinet footprint and reinstall the trim later if the bed is removed.
- Add a spacer frame behind the cabinet, though this reduces floor clearance and is rarely worth it.
Electrical outlets inside the cabinet footprint must be relocated by a licensed electrician. Do not bury an outlet behind a wall bed or cut into a live circuit. If a switch or outlet sits in the swing path, plan relocation before drilling.
Weight Limits, Mattress Compatibility, and Safety Checks
Wall bed weight limits are set by the manufacturer and assume a specific mattress type and thickness. Exceeding them stresses the piston mechanism and the wall fasteners simultaneously.
Mattress compatibility matters more than most buyers expect. Wall beds are typically designed for foam or latex mattresses, which are lighter and more flexible than innerspring. A heavy coil mattress can overload the piston system and make the bed difficult to raise.
Because Comfort Zone Shop manufactures custom-size mattresses, you can match thickness and weight to your specific cabinet rather than guessing.
Before first use, run this safety check:
- All baseplate bolts torqued to spec
- Cabinet plumb and level within 1/8 inch
- Piston tension tested through three full fold cycles
- Safety tether or locking strap installed
- No wiring, plumbing, or outlets inside the cabinet footprint
- Clearance path clear of furniture and fixtures
Watch Out
Never test a newly installed wall bed with a person on it before completing the full safety checklist. Load-test with the mattress and bedding first, watching for any movement at the baseplate.
Post-Installation Maintenance for Murphy Beds
Maintenance is the step almost every guide skips, and it is where long-term safety lives. A wall bed has moving parts under constant load, so it needs periodic attention like a garage door.
Every three months, check the baseplate bolts with a socket wrench. Vibration from folding cycles loosens fasteners, and a bolt backed out even a quarter turn reduces holding strength.
Twice a year, inspect the piston mechanism for smooth operation and listen for grinding or uneven resistance. Lubricate pivot points with dry silicone spray, never oil, which attracts dust and gums up the mechanism. Check the safety tether for fraying and replace it if in doubt.
If the bed becomes noticeably harder to lift, that is usually piston wear rather than a structural problem. Replacing the pistons is far cheaper than replacing the cabinet.
Conclusion
A wall bed anchored correctly, tuned properly, and maintained on schedule will outlast the room it sits in. The failure mode is almost never the cabinet; it is skipped stud verification, buried outlets, or a piston adjustment nobody revisited.
If you would rather not gamble on a DIY install, Comfort Zone Shop offers professional delivery and installation, plus custom-size mattress manufacturing so the mattress weight matches your cabinet's rated capacity. We also offer instant rebates on wall beds, so you can upgrade your space without stretching the budget.
Get started with Comfort Zone Shop and turn that spare room into a guest bedroom that disappears when you need the floor back.
Frequently Asked Questions
Do Murphy beds have to be screwed into the wall?
Yes, most wall bed systems must be fastened into wall studs to handle the weight of the bed, mattress, and anyone sleeping on it. The mounting hardware and baseplate are designed to transfer that load into the framing behind the drywall. Skipping stud anchoring and relying on drywall alone creates a serious safety risk. Comfort Zone Shop offers professional delivery and installation if you are not comfortable locating studs or drilling into your walls yourself.
Can you install a Murphy bed on drywall?
Drywall alone cannot support a wall bed. You can mount the cabinet so it sits flush against drywall, but the fasteners must reach the studs or masonry behind it. If a stud is not where you need one, a contractor can add blocking between studs. Toggle bolts help with light fixtures, not a loaded bed frame. Always verify your wall construction before drilling.
What tools are required for professional-grade Murphy bed installation?
You will need a stud finder, a 4-foot level, a power drill with bits sized for your fasteners, a socket set, and a tape measure. A rubber mallet helps seat the frame, and shims correct minor floor unevenness. For masonry walls, add a hammer drill and masonry anchors. Most hardware kits include the bolts and lag screws, but check the installation manual for the exact drill bit size before you start.
How hard is it to put in a Murphy bed?
A basic assembly takes two people four to six hours. The hardest parts are locating studs accurately, keeping the cabinet plumb, and adjusting the piston mechanism so the bed lowers smoothly. If your wall has baseboards, trim, or an outlet in the way, add time for modifications. For a custom-sized wall bed or one going into a condo with strict building rules, hiring professional installation is the safer route.
Related post

08
Oct

30
Sep