

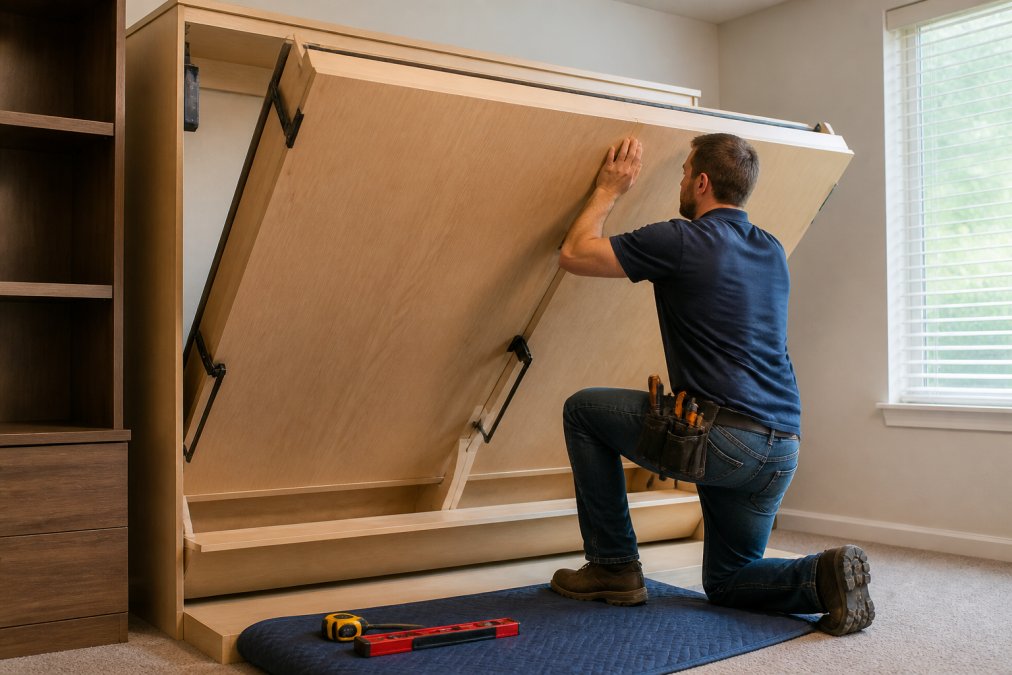
How to Safely Install a Murphy Bed: Step-by-Step
Table of Contents
- What You'll Need Before Starting
- Preparing Your Installation Area
- Murphy Bed Wall Anchoring Requirements
- Step-by-Step Installation Process
- Best Tools for Murphy Bed Installation
- Murphy Bed Installation Time Estimate
- Troubleshooting Murphy Bed Installation Issues
- DIY vs. Professional Installation Decision
Last Updated: August 15, 2026
A Murphy bed transforms tight living spaces into functional dual-purpose rooms, but improper installation can lead to safety hazards, structural damage, or a bed that fails mid-use. Installing a Murphy bed safely requires understanding wall structure, using proper fastening techniques, and following manufacturer guidelines precisely. This guide from Comfortzoneshop walks you through the complete installation process, from pre-installation assessment to post-installation maintenance, so you can confidently set up your space-saving solution.

What You'll Need Before Starting
Before touching a single fastener, gather the right tools and safety equipment. Skipping this step is where most DIY installations falter.
Tools and Materials Required
You'll need a drill-driver with standard and Phillips bits, an electronic stud finder, a 24-inch level, a tape measure, a pencil, and a socket wrench set. A power drill with torque settings helps you avoid over-tightening fasteners.
Your Murphy bed kit should include lag bolts for stud anchoring, toggle bolts for drywall-only mounting, and washers to distribute load. Never substitute with standard drywall anchors alone, they cannot support a bed's weight. A carpenter's square ensures your frame sits plumb and level. You'll also need a helper; Murphy beds are heavy, and two people prevent mistakes that one person rushing alone might make.
Safety Equipment and Precautions
Wear safety glasses when drilling and work gloves for better grip on heavy components. A dust mask is essential if drilling into older drywall, which may contain asbestos in homes built before the 1980s.
Never work alone on a Murphy bed installation. The bed frame weighs 50 to 100 pounds, and positioning it overhead or against walls requires two people to prevent serious injury.
Preparing Your Installation Area
Wall preparation determines whether your Murphy bed installation succeeds or fails.
Evaluating Wall Type and Structural Integrity
Load-bearing walls (typically exterior walls or walls running perpendicular to floor joists) can safely support a Murphy bed. Non-load-bearing walls may not. If unsure, consult your home's structural plans or hire a structural engineer for assessment.
Plaster walls require toggle bolts designed for plaster and careful drilling to minimize cracking. Masonry walls demand masonry anchors and a hammer drill.
Check for water damage, soft spots, or mold by pressing your hand against the wall. If it feels spongy or shows discoloration, moisture has compromised structural integrity. Address moisture problems before installing your bed.
Locating Wall Studs and Marking Mounting Points
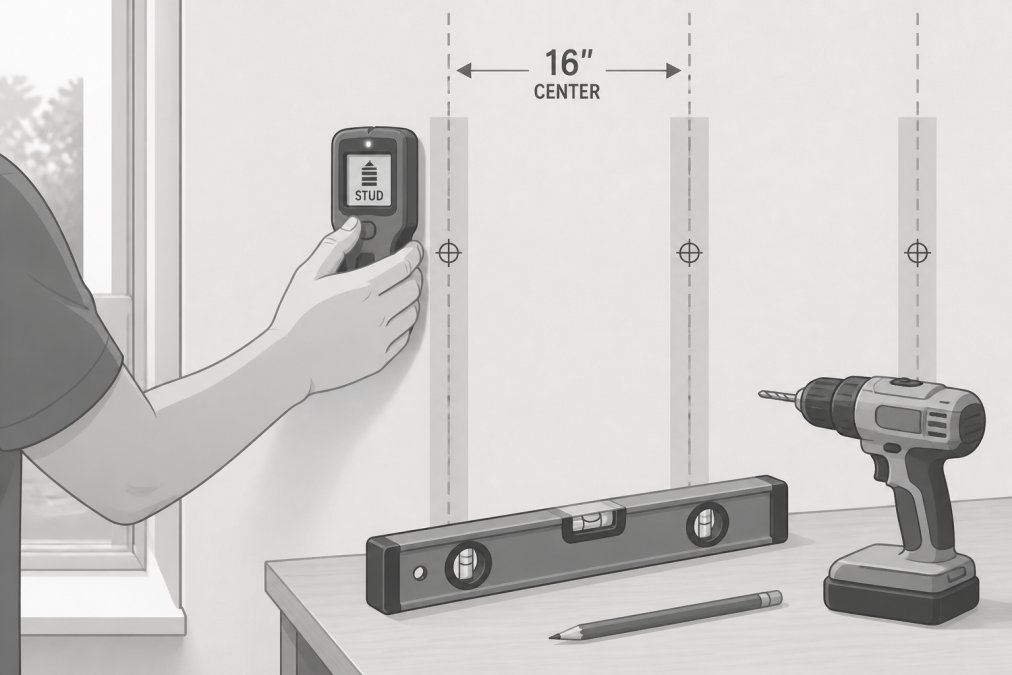
Wall studs are vertical wooden framing members typically spaced 16 inches apart, center-to-center. Finding them accurately is non-negotiable.
Use an electronic stud finder to locate studs and mark each location with a pencil. Double-check by tapping along the wall, studs sound solid, while areas between studs sound hollow.
Your Murphy bed mounting points should align with at least two studs, ideally three or four. If studs don't align with your mounting points, reposition the bed slightly to align with studs or use heavy-duty toggle bolts rated for your bed's weight. Mark your mounting points with a pencil before drilling, using the bed's installation template to ensure correct spacing.
Murphy Bed Wall Anchoring Requirements
The anchoring method you choose determines whether your bed is safe for years or becomes a liability.
Fastening to Wall Studs
Stud fastening is the gold standard. Lag bolts (typically 3/8-inch diameter, 3 to 4 inches long) driven into studs can support 500+ pounds per fastener. Drill a pilot hole slightly smaller than your lag bolt diameter to prevent wood from splitting. Insert the bolt with a socket wrench, tightening until snug, not excessively. Use a washer under each bolt head to distribute pressure across a larger area and prevent gradual settling.
Anchoring to Drywall and Non-Standard Walls
If studs don't align with your mounting points, toggle bolts are your primary option. Toggle bolts have spring-loaded wings that expand behind drywall, rated for 100 pounds per anchor in 1/2-inch drywall.
Never use standard plastic wall anchors for a Murphy bed, they're designed for light fixtures, not 200+ pounds of concentrated load. Masonry walls require masonry anchors and a hammer drill. Use a hammer drill with a masonry bit to create the initial hole.
Floor Plate Installation and Load Distribution
The floor plate prevents tipping and distributes weight evenly. Install it according to manufacturer specifications, typically with fasteners every 16 inches along its length.
If your floor is hardwood, use fasteners that won't split the wood with pilot holes. If concrete, use concrete anchors rated for your bed's weight. Ensure the floor plate sits flush against the floor, gaps allow the bed to rock and stress fasteners. Use shims if necessary.
Step-by-Step Installation Process
Follow each step in order; skipping or reordering steps is a common source of problems.
Assembling the Cabinet Frame
Start by assembling the main cabinet frame on the floor, not on the wall. This allows you to verify that all pieces fit, corners are square, and moving parts operate smoothly before mounting permanently.
Lay out all frame pieces on a flat surface and connect sides to top and bottom using provided fasteners. Use a carpenter's square to verify 90-degree corners. Install any shelving or storage components now, before the frame goes on the wall. Tighten all joints firmly but don't over-torque.
Installing the Piston Mechanism and Hardware
The piston mechanism allows the bed to open and close smoothly. Follow the manufacturer's instructions for your specific mechanism, installing pistons in exact locations specified.
Test the mechanism by opening and closing the bed frame multiple times before mounting to the wall. The bed should move smoothly without sticking or requiring excessive force. Check the counterbalance, a properly balanced bed requires light pressure to open and won't slam shut on its own. Adjust piston tension according to manufacturer guidelines if needed.
Mounting the Bed to the Wall
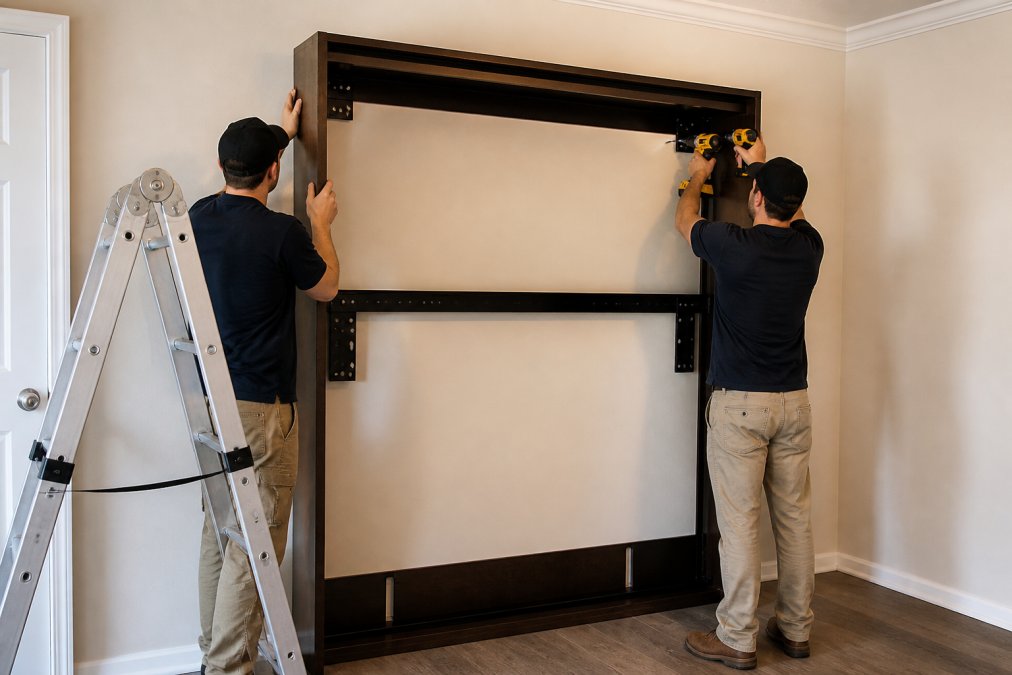
Have your helper hold the frame level while you drive fasteners. Start with the top fasteners, then work downward. Use a level constantly, checking both horizontal and vertical alignment.
Tighten fasteners in a crossing pattern, partially tighten all fasteners first, then fully tighten. This distributes pressure evenly and prevents one side from pulling the frame out of level. Once the frame is mounted, install the front panel and any additional hardware, ensuring the panel is flush and doesn't interfere with opening or closing motion.
Testing Stability and Adjusting Leveling
Before using the bed, test its stability thoroughly. Push on all areas of the frame with moderate force, it should feel solid with no movement or creaking. Open and close the bed 20 times, listening for grinding, squeaking, or binding sounds.
Test the weight capacity by gradually adding weight, starting with 50 pounds and progressing to full mattress and person weight. Check that the bed closes fully and latches securely.
Best Tools for Murphy Bed Installation
An electronic stud finder is non-negotiable and saves time. A cordless drill-driver with variable speed and torque control prevents over-tightening. A 24-inch level ensures accurate alignment. A socket wrench set properly tightens lag bolts without rounding them. A carpenter's square verifies corners are square. Shims adjust for uneven walls.
Murphy Bed Installation Time Estimate
Expect 4 to 8 hours for a first-time DIYer, depending on wall condition and tool comfort. Professional installation typically takes 3 to 4 hours. Comfortzoneshop offers professional installation services in the Tampa, Clearwater, St. Petersburg, and New Port Richey areas, ensuring your bed is mounted correctly and safely.
Troubleshooting Murphy Bed Installation Issues
Common Mistakes to Avoid
The most frequent mistake is fastening to drywall alone without studs. Drywall cannot support a Murphy bed's weight over time. Always locate studs and use them for primary support.
Over-tightening fasteners can crack wood, strip threads, or pull fasteners through drywall. Snug is sufficient. Skipping the leveling step creates problems that appear weeks later, as uneven stress causes fasteners to loosen. Installing the piston mechanism incorrectly causes the bed to bind or require excessive force to open. Test the mechanism thoroughly before mounting to the wall. Ignoring wall condition is dangerous, moisture-damaged or compromised walls won't hold fasteners reliably.
Post-Installation Maintenance and Safety Checks
After installation, check your Murphy bed monthly. Open and close it several times, listening for unusual sounds, and tighten any loosened fasteners. Inspect the piston mechanism for leaks, if you see oil or fluid, the mechanism is failing and needs replacement.
Check the floor plate quarterly to ensure fasteners are tight and the plate sits flush. Test the weight capacity annually by placing your normal sleeping weight on the bed and checking for movement. Keep the track clean and free of debris.
DIY vs. Professional Installation Decision
Installing a Murphy bed yourself saves money but requires comfort with power tools and understanding of wall structure. If you have experience with home projects and your walls are in good condition, DIY installation is feasible.
Professional installation eliminates guesswork. Installers assess your walls, choose optimal fastening methods, and ensure perfect alignment. If your walls are problematic, you're uncomfortable with tools, or you need quick installation, professional installation is the better choice.
Comfortzoneshop's Murphy bed cabinets, like the Clover Murphy Cabinet Bed, are engineered for durability and come with clear installation guidelines. Our team in Tampa, Clearwater, St. Petersburg, and New Port Richey can handle professional installation, ensuring your bed operates safely for years.
Installing a Murphy bed safely transforms your space without compromising structural integrity or safety. The process demands attention to wall structure, proper fastening techniques, and thorough testing. If you're uncertain about any step, consult a professional or contact Comfortzoneshop for guidance. Our custom-sized mattresses and expert installation services ensure your space-saving solution is comfortable and reliable. Get started with Comfortzoneshop and maximize your living space with confidence.
Frequently Asked Questions
How hard is it to install a Murphy bed safely?
Installing a Murphy bed safely requires careful planning, proper tools, and attention to wall anchoring requirements. Most homeowners with basic DIY experience can complete installation in 4-6 hours, though the difficulty depends on wall type and structural integrity. The most critical step is anchoring to wall studs or using appropriate fasteners for your wall type. If you're unsure about your wall's load-bearing capacity or lack experience with power tools, professional installation is recommended to ensure the bed operates smoothly and safely.
Do Murphy beds need to be anchored to the floor?
Yes, proper floor plate installation is essential for Murphy bed stability and safety. The floor plate distributes weight evenly and prevents the bed from shifting or tipping. Most Murphy beds require fastening at both the wall and floor to meet safety standards. Floor anchoring also helps maintain proper alignment for the piston mechanism and ensures smooth operation over time. Check your specific bed's installation manual for floor anchoring specifications and torque requirements.
Can I install a Murphy bed on drywall alone?
Installing directly into drywall without wall studs is not recommended for safety. Murphy beds require anchoring to solid structural support. If wall studs aren't available, you must use heavy-duty fasteners like toggle bolts or masonry anchors designed for your wall type. These alternatives distribute weight more effectively than drywall anchors alone. For maximum safety and longevity, locate and anchor to wall studs whenever possible. If your wall cannot accommodate proper anchoring, consult a professional installer before proceeding.
What's the best way to ensure my Murphy bed stays level and operates smoothly?
After installation, test leveling by checking that the bed frame sits flush against the wall with no gaps. Use a level tool to verify the frame is plumb and level in all directions. The piston mechanism should have consistent tension throughout the opening and closing cycle. Adjust fastening tension if needed, but don't over-tighten, as this can stress the pivots. Schedule regular maintenance checks every 6-12 months to inspect fasteners, lubricate hinges, and verify the bed's structural integrity and safety tether function.
This article was written using GrandRanker
Related post


08
Oct

30
Sep